
mkvtoolnix
http://www.bunkus.org/videotools/mkvtoolnix/win32/mkvtoolnix-unicode-4.6.0-setup.exe
mkvextractGUI
(NOTE)
mkvextractGUI must be in the same folder as mkvtoolnix in order to work properly
http://www.videohelp.com/download/MKVExtractGUI-2.2.2.5.zip
AVI ReComp
http://www.avirecomp.com/request.php?42
DVDVideoSoft
http://www.dvdvideosoft.com/download/FreeAVIVideoConverter.exe
http://dvdvideosoft.com/download/FreeVideoToiPhoneConverter.exe
DVDVideoSoft Studio
http://www.dvdvideosoft.com/
iTunes
http://www.apple.com/uk/itunes/download/
When doing this I prefer that the original is in MKV format because it supports multiple audio and subtitles tracks thus giving DVD-like control with a media player such as VLC Player.


(Note) If you have an MKV with multiple audio tracks for example you have English and Japanese audio with the English track being the default, you would need to use mkvtoolnix if you wanted the Japanese track to be the default setting. Like with mkvextractGUI, you open the MKV in the program and tick the boxes of the video, audio and subtitle tracks you want the MKV to have and leave the other audio tracks unticked or you could click on the default track flag option in the general track options tab and change the audio track you want into the default audio setting and finally click on the Start muxing button after setting the output and this will make a new MKV with only the tracks that you have ticked.

(Note) If you have an MKV with multiple audio tracks for example you have English and Japanese audio with the English track being the default, you would need to use mkvtoolnix if you wanted the Japanese track to be the default setting. Like with mkvextractGUI, you open the MKV in the program and tick the boxes of the video, audio and subtitle tracks you want the MKV to have and leave the other audio tracks unticked or you could click on the default track flag option in the general track options tab and change the audio track you want into the default audio setting and finally click on the Start muxing button after setting the output and this will make a new MKV with only the tracks that you have ticked.
Firstly with the MKV file that you want to convert (I’ll be using Kira Fansubs encode of Highschool of the Dead Episode 9 for this.) is to extract the subtitles file from the MKV.


Open up mkvextractGUI and open the MKV into the program and select the subtitles file and click on Extract after setting the output of where you want the extracted files to be.

For this tutorial I'll being extracting everything in the MKV because some fansub groups include the fonts that they have used in order to produce the subtitles file itself.

After the extracting process is finished, you should now have a number of files on your desktop (I have put them into a new folder to make them easier to identify).

The two highlighted files contain the MKV's video and audio and these are not needed so delete them.

Now you should have only the subtitles and font files left.
(Note) If the subtitles came from a DVD or similar source ignore this part of the tutorial.

Since I'm using an MKV with a fansub I'm going to install the fonts that were extracted from the MKV and the reason why I'm doing this is because I want the subtitles to look exactly like they are in the MKV and also if an MKV is converted to AVI with software such as Any Video Converter, the subtitles are undefined and will look something like in this example screenshot below.

As you can see the subtitles are chunky and take up most of the screen and ultimately ruins the viewing experience. Since I'm using Windows 7, I highlight all of the font files then right-click and select the Install option to add the fonts into the system.
(Note) If you have Windows XP or Vista please use the links provided on how to install fonts
For XP users: http://www.microsoft.com/resources/documentation/windows/xp/all/proddocs/en-us/windows_fonts_addnew.mspx?mfr=true
For Vista users: http://windows.microsoft.com/en-us/windows-vista/Install-or-uninstall-fonts


Now that the fonts are installed, the next step is to convert the MKV into an AVI and for this you will need DVDVideoSoft AVI Video Converter.
(Note) I downloaded the whole studio package instead of just the programs themselves to save time and its up to your own discretion if you get the whole studio or the individual programs.

If you download the studio package, open DVDVideoSoft Studio and select DVD & Video then click on AVI Video Converter.

After opening AVI Video Converter, Set the format to AVI (If not set as default) and change the output to Original Quality and the audio should be MP3 format.
(Note) You also may have to set the sample rate and bitrate of the audio because I didn't once before converting an AVI and when I added it into AVIReComp the program didn't pick up the audio track and you do this by clicking on the magic wand icon next to the output settings.


Next open the MKV into the program and with the settings done, click on the Convert button.

When the conversion is finished, you should have an AVI in the Videos folder in its original resolution and the next step is to now add the subtitles.

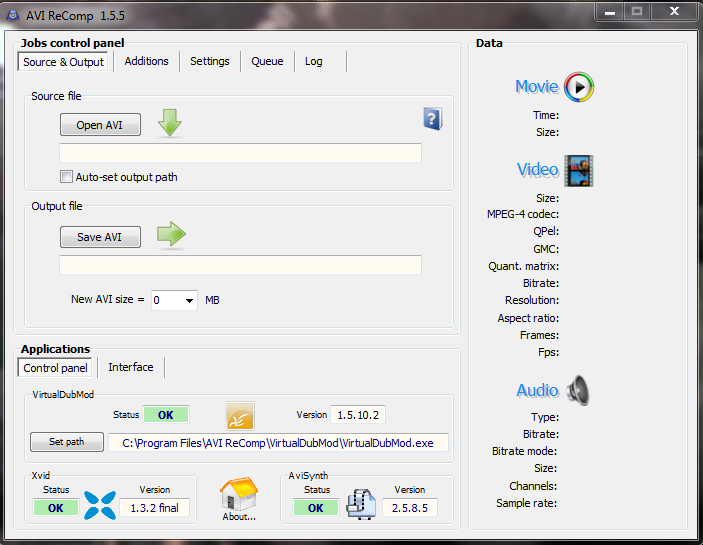

Open AVIReComp and open the AVI that you've just converted and set the output path as I've done here to make it easier to find later and now click on the Additions tab.

Now that you are on the Additions tab, tick the enable/disable subtitles box and the Load Subtitles button should be usable and click on it.

Now find the subtitles file that you extracted from the MKV before and open it into the program.

Now the subtitles are loaded, Click on the Queue tab for the next step.

After clicking on the Queue tab, click the Add To Queue button and click on the Start to begin the encoding process.

After the encoding is complete, you now have an AVI with subtitles and a text file on your desktop and now you are ready for the final part of this tutorial.
(Note) If you are following this guide to convert your videos to play them on a PS3, then you do not need to do anything more than this step because PS3 plays the video format with no problem.

Go into DVDVideoSoft Studio again, but this time you want to click on the Apple Devices tab and then click onto Video to iPhone.

After opening Video to iPhone, change the Quality to high and the output to that of whatever model your iPhone or iPod is and open the AVI from your desktop into the program and click on Convert.

After the AVI has now just converted into an MP4, it is now time for the last step.


Open iTunes and go down to the Films tabs on the left side and click on it.
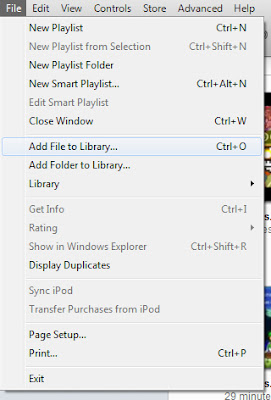
Next click on the File tab and scroll down to the Add File to Library option and find the MP4 that you've just converted.
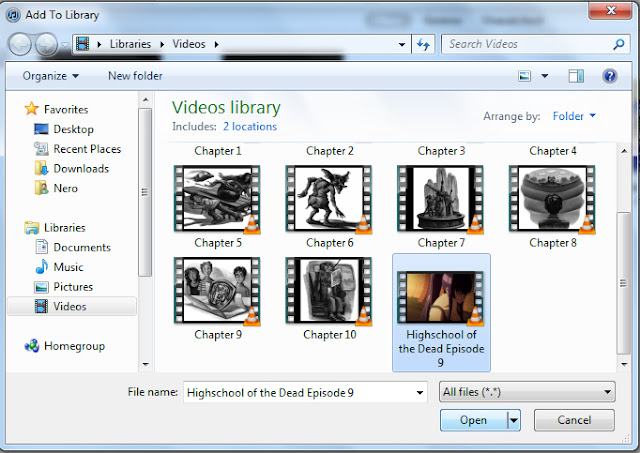

After finding the MP4, click OK to bring it into iTunes.

Next go to the Advanced tab and scroll down to the Create Apple iPod/iPhone option with the video highlighted.

This creates an M4V format video with the same quality as the original MP4 and this also reduces the overall size of the video itself from the MP4 which was 400MB to the new M4V which is 275MB.

Here is the final video file in the iTunes Video folder which I have moved to my desktop and changed some of its properties such as the 01 that has been added to the title.

And there it is on my desktop with everything done and the properties changed.

Here I want show you how the video should now look in the Videos application on your iPod/iPhone (using my iPhone 3GS as an example) after syncing them by using some screenshots taken by holding down the Power button and then pressing the Home button.

As you can see you can switch between a widescreen or a full screen presentation depending on your viewing preferences.

And with that said that is the end of the tutorial and I hope that you found it helpful and useful.

(Note) One last thing I forgot to mention originally is that DVDVideoSoft Studio has other programs which will convert the video for other devices like Xbox 360, Wii and Blackberry which can all be found in the Mobiles section of the studio.

Just follow the process in this tutorial up until the iPhone/iPod conversion step and pick the program for your chosen device.